Tuesday, May 31, 2011

Over the Hill Party set


I had no idea how many fun cuts were on the Life’s a Party cartridge until I started flipping through the book. This cartridge is awesome for just about any kind of party! There are so many cool projects you can create with it.

I will be perfectly honest here and tell you, I will be the big 40 this year, so that was my inspiration for my party set.

I started with the tombstone, which I cut at 11”, and then decided to perch the vulture on top (cut at 5”). The skulls around the bottom of the tombstone weren’t part of that cut. They actually are in the section with the pirate party cuts, but that’s another great thing about this cartridge, you can mix and match different embellishments. The wording was cut from Plantin Schoolbook, set at ¾”.


The next thing I made was the invitation. I cut it at 5.5”. The brackets are actually from the “RIP” cupcake topper, but I thought they looked great on here also.


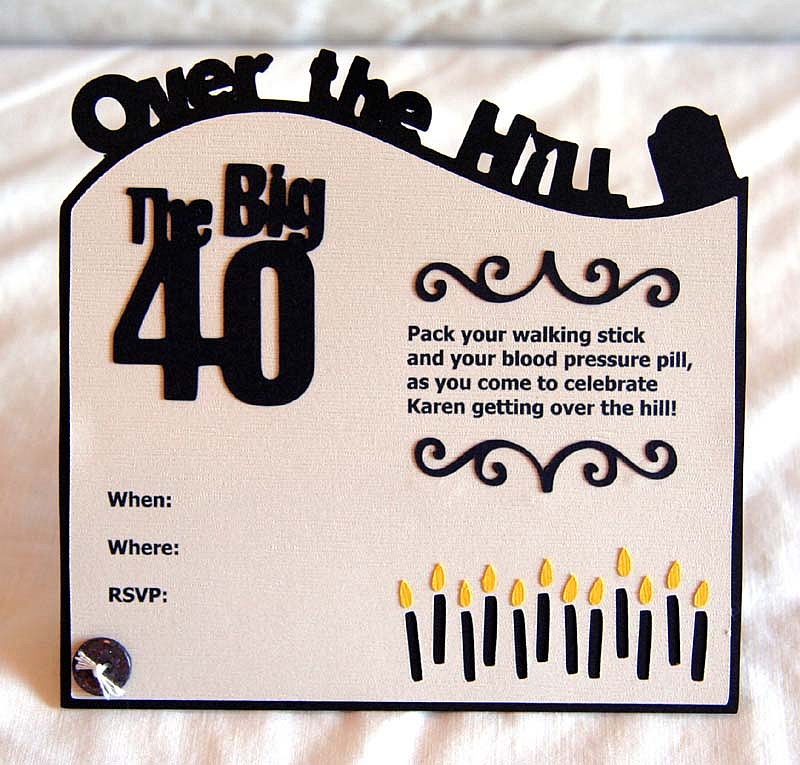
And what’s an over the hill party without a couple of jabs at the birthday girl/guy? The glasses were cut at 4” and the favor/gift box was cut at 10 ¾”.


When creating my tombstone centerpiece for my over the hill party set, the vulture gave me a bit of a problem. After I perched him on top, he started to droop forward. I came up with an easy fix for this. I simply cut two strips of cardstock, glued them together for strength, and adhered them to the back of my vulture and tombstone to act as a brace. No more drooping!

Monday, May 23, 2011

Flying High

Donna chose the flying bird from Florals Embellished for the challenge at BBTB2 this week. I made something a little different than my usual card this week. It's still a card, but it comes in it's own coordinating gift box. It would be a great "dressed up" way to give a gift card. Come join us for the challenge at BBTB2 this week!


Wednesday, May 18, 2011

How to make a shaped card with your Cricut

Making a shaped card is so easy with your cricut and design studio.

First, decide which shape you want to use. I chose the pear from "Joys of the Season". Next, place your pear on your virtual mat in design studio and check the welding box.


Now place a second pear to the left of the first one on your mat:


Third, check the Flip Shapes box for your second pear:


Now drag the second pear so that it overlaps with the first pear:


Check the Welding box for you second pear:


Now cut out your welded card and this is what you get:


Score along the welded spot and fold over:

Now you can make your own shaped cards with pretty much any shape you want!

Wednesday, May 11, 2011

Farm Fun layout, and a little tip

My assignment for CX was to use the Create a Critter cartridge. I was so excited to use this cartridge because it is FILLED with the most adorable critters of all types. I had these pictures of my son at the Old Farmer's Days festival, so they were just perfect for this assignment. I started my layout by cutting the animal print paper into a scalloped circle using the Accent Essentials cartridge set at 11.25". I cut the striped paper and adhered it to the right hand page, then adhered the scalloped circle on the left side. I placed my photos over that, then created my title using the Old West cartridge set at 2.5". Then came the fun part, the critters! Both the sheep and the chick were cut at 3". These were arranged over the silk flowers for contrast. The journaling tag and chunky brads were the finishing touches.


Many of your great Cricut cuts can be "lost" on your page if you are mounting them over patterned paper, or even a similar colored cardstock. A great way to make your cuts stand out is to mount them over a silk flower before mounting them to your page. It gives it great contrast and allows the eye to focus better on the cut.


Monday, May 9, 2011

Berry Sweet

The challenge at BBTB2 this week was chosen by Jeri. She chose the strawberry from Simply Charmed. The closest thing I had was this strawberry from Country Life. I really like how this card turned out. Thanks Jeri for the great challenge!

Wednesday, May 4, 2011

Cowboy Up! (and a tutorial)

I had the cutest picture of my youngest son dressed up as a cowboy for Halloween, so the Old West cartridge was the perfect thing for this page. This cartridge is absolutely filled with great western cuts. I started my layout by using the cartridge set at 1” to cut a stencil to be used with the glimmer mist along the bottom of the page. Then I layered my pieces of patterned paper and adhered my photo and ribbon. I cut the rope at 2 ¾”, the title at 3”, the hat at 1 ¾”, and the badge at 2”. Then I gave them a spray with the glimmer mist to give them a more aged appearance. I finished dressing my page with the epoxy brads.


We all know what great embellishments you can cut with your cricut, but you can also use that negative space to create stencils for glimmer mist, paint, chalk, etc.

I used the star cut from the Old West cartridge and cut a row of stars on my cardstock. Then I placed this stencil over my background paper, covered the rest of my background paper with another piece of cardstock, then sprayed my glimmer mist over the stencil.

What you end up with, is a perfect line of glimmer mist stars on your page.