
Papers - My Mind's Eye
Candle - Wrap it Up (4.25")
Fancy scroll work - Storybook (3")
Candle - Wrap it Up (4.25")
Fancy scroll work - Storybook (3")

 PP - BG Eerie, and BG Crude
Agnes chose the cut at BBTB2 this week and she chose the vulture from Life's a Party.
I will be perfectly honest here and tell you, I will be the big 40 this year, so that was my inspiration for my party set.
I started with the tombstone, which I cut at 11”, and then decided to perch the vulture on top (cut at 5”). The skulls around the bottom of the tombstone weren’t part of that cut. They actually are in the section with the pirate party cuts, but that’s another great thing about this cartridge, you can mix and match different embellishments. The wording was cut from Plantin Schoolbook, set at ¾”.

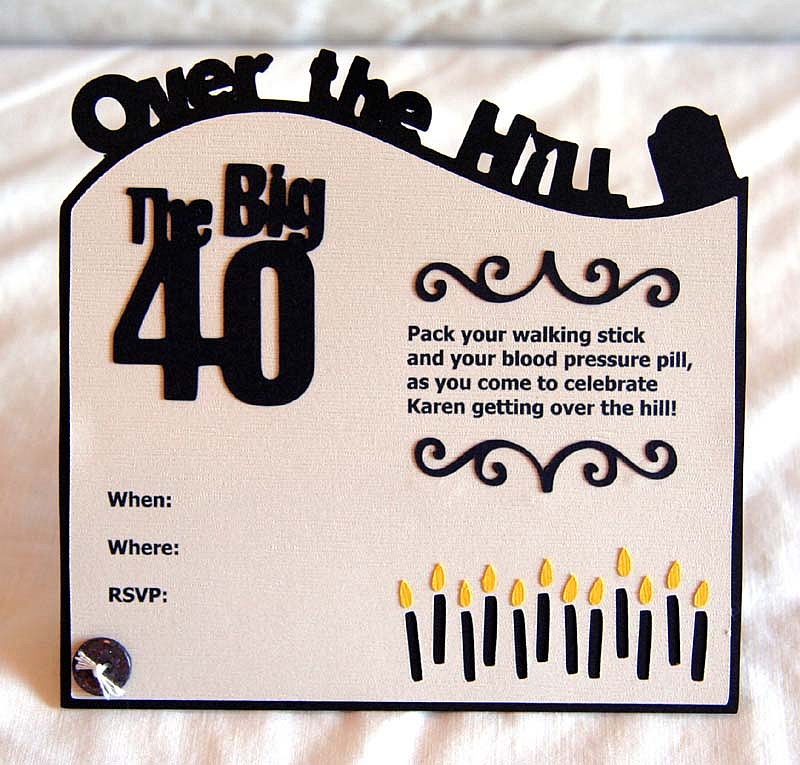
The next thing I made was the invitation. I cut it at 5.5”. The brackets are actually from the “RIP” cupcake topper, but I thought they looked great on here also.


 Cartridge - Life's a Party
 Cricut cart - Paper Doll Dress Up
I just love the versatility of Stickles. Depending on how you use them, you can get glittery dimension, or you can get an all over soft sparkle.
For dimension, just apply the Stickles straight out of the bottle, like this:


I started my layout by cutting two rectangles of the patterned paper and positioning them on my white background. Then I added the die cuts and title. I added the jewels in the corners because I just have to have some bling on almost every project. Lastly, I added the three stripes in the bottom corner because they somehow remind me of a car. (I don’t know how, but they do!)

 Cricut cart - A Child's Year cut at 5"

 Cricut cartridge - Create-A-Critter


I chose the butterfly image, set at 1.5 inches. I layered this over the mustard colored paper, which was over another sheet of black cardstock. Then I matted my photos, positioned them on the page, and added the flowers. The title was cut from the Home Decor cartridge set at 2 1/8". The orange scalloped border was made using the Accent Essentials cartridge set at 1", and then manipulated and welded together using Design Studio.


I had no idea how many fun cuts were on the Life’s a Party cartridge until I started flipping through the book. This cartridge is awesome for just about any kind of party! There are so many cool projects you can create with it.
I will be perfectly honest here and tell you, I will be the big 40 this year, so that was my inspiration for my party set.
I started with the tombstone, which I cut at 11”, and then decided to perch the vulture on top (cut at 5”). The skulls around the bottom of the tombstone weren’t part of that cut. They actually are in the section with the pirate party cuts, but that’s another great thing about this cartridge, you can mix and match different embellishments. The wording was cut from Plantin Schoolbook, set at ¾”.
The next thing I made was the invitation. I cut it at 5.5”. The brackets are actually from the “RIP” cupcake topper, but I thought they looked great on here also.


First, decide which shape you want to use. I chose the pear from "Joys of the Season". Next, place your pear on your virtual mat in design studio and check the welding box.


 Now you can make your own shaped cards with pretty much any shape you want!


